Okay, so you've been wanting to know some of this stuff for a while, so here it is! First of all I edit my photos in Photoshop and only Photoshop. There is no limit to what you can do in it - even now where polaroid like photos are "in" - you can do that and still have a say in the outcome (with many automatic polaroid generators, it can be difficult to make it exactly as you would like it)!
Here you get a guide to gradients in photoshop, which I'm really in to at the moment. Please let me know if you're having trouble with the tutorial - I'll make sure to respond :)
Enjoy!
xx,
Mikaela
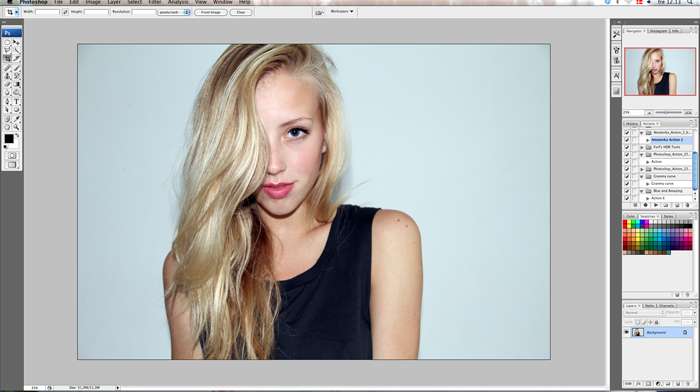
Step 1. Open your image in photoshop. Edit it however you like, and we'll get to the gradients.
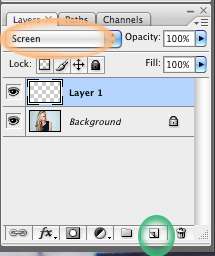
Step 2. Go down to the bottom right corner and make a new layer (Cmd+N on Mac or Ctrl+N in windows or just press the icon which I've marked with green). Next, you change the layer mode (orange circle) to Screen. This will make the colours look reeeaaal good.
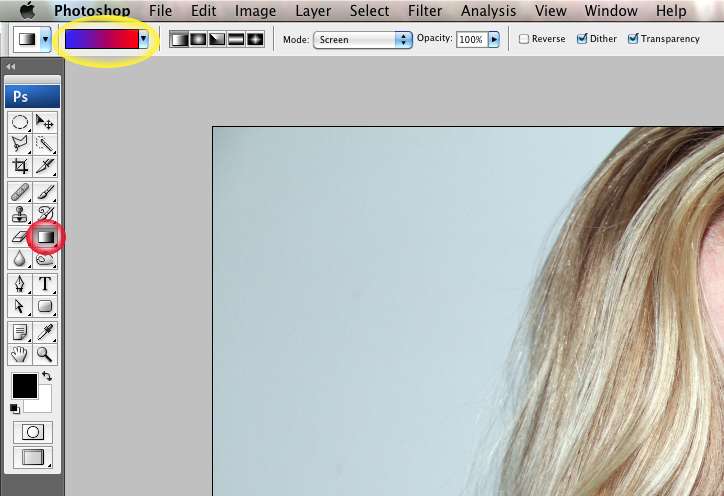
Step 3. Here comes the juicy bit - adding the colours! In your toolbox on the left you see a square (marked with red) - choose this tool and select your colours in the top (marked with yellow). For this image I've chosen to go with blue and red. There are so many options with gradients, it's just a matter of trying!
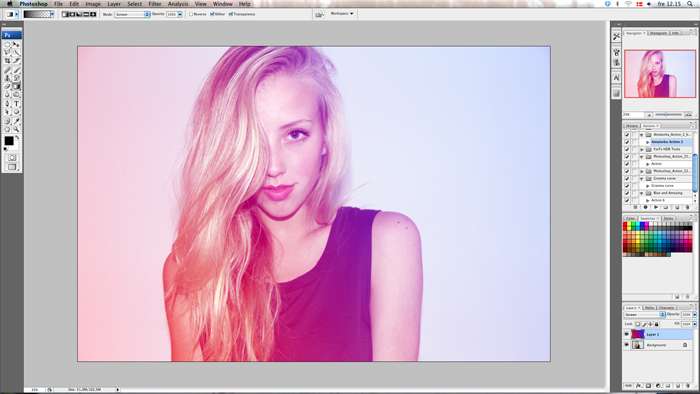
Step 4. Now take your mouse and "draw" a line across your image. It should instantly look something like this:
And Voilà - what looked like this before:

Now looks like this:

I hoped you found it useful!
Lots of love,
Mikaela
No comments:
Post a Comment